

Your Insanely Actionable and Comprehensive Guide on How to Start a Blog
For most people planning to start blogs, the motivation comes from the success stories of seven-figure perched bloggers.
Who wouldn’t?
Blogging lets, you write about anything you are passionate about, in your unique style and voice. You don’t write within specific restrictive writing guides, and you can let out all those thoughts you bottle away.
And for the most part, this kind of motivation is what we all need to succeed in our endeavors.
But, here’s the kicker – more than half the people who started the years with high hopes of successful blogs failed and gave up. A few years from today, only a handful, or rather tens of these bloggers will be recognized.
Now, the difference between these two classes of bloggers might not be obvious from the get-go.
However, if asked, you will realize that successful ones learned from the best. They got the help they needed earlier in the game and had professional help or professionally prepared guides that made them the successful and fully-fledged bloggers they are.
Getting started on how to blog in the right way early in your blogging career remains the biggest line between blogs with a loyal and growing readership, and the ones forgot about soon after they are launched.
Your presence here means that you are interested in the success of your blog and you want to start right. You want a guiding print in the right direction. And though mistakes are inevitable in the process, you wish to avoid the fatal mistakes associated with blogging.
This guide’s got your back, and you don’t even need to learn HTML or spend days going through long, jargon-filled, and boring tutorials.
So, let’s get started.
Contents In Page
How to Start a Blog – Overview
You can wake up one day and decide to start a blog, but not without a blueprint that gives you a general idea of the process. There are seven fundamental elements or steps to follow when starting your blog.
- Identifying the purpose of the blog and decide what you will be blogging about
- Choosing a blogging platform
- Choosing Your Domain Name
- Buy Domain Name & Web Hosting Then Setting up your blog
- Blog Design and Adding functionalities
- Blog Optimization
- Content creation – adding posts and pages to build your blog
- Growing your blog
Next, we break down this blog into parts, looking at each section in detail.
Note that this blog has actionable tips and that it is long. Depending on your reading speed, you need about 20-30 minutes for a general idea on how to create a blog.
Step1: Identifying the Purpose of the Blog
What is the reason why you wish to create a blog? Is there an idea or passion that drives you?
While people get into blogging with the general idea of writing about anything and everything under God’s blue sky, this is also the reason why most people fail.
If you want to succeed in blogging, define your passion and refine your thoughts. Isolate that one thing you are passionate about – the subject you can write or talk about in your sleep. Even though you’ll have to research extensively, a specific topic lets you isolate and target an audience.
Unfortunately, even when you have an awe-inspiring idea that sounds unique, it’s important to acknowledge the fact that no idea is truly unique – someone has thought and written about it.
To be different, ask yourself these two questions: can I spend the rest of my life (in blogging) learning about the topic, and who else is interested in the subject?
The answers to these questions will tell you whether or not blogging on that topic is for you, or not. And, when your research reveals that what you are interested in writing has been written about, you can look at the specific gaps your competitors left out.
The answer to the second question above guides every aspect of your writing/ content creation and marketing prospects – it is keyword research. We’ll learn more about it later in this guide.
Whether or not you are willing to learn more about the researched topic depends on your actual reason for blogging.
Some of the reasonable reasons for you to go through all the trouble to the blog include the need to make money from home, inherent need to share your story, looking for and building a community, or the search for recognition for your business or self.
Now that your answers to the tough questions, let’s take the technical path.
Choosing a blogging platform, domain name registration, and hosting
Step2: Choosing the Blogging Platform
With several blogging platforms out there, how do you make the tough choice of choosing one over the other?
When starting out and with little to no coding knowledge, you need to start a blog on a platform with an easy setup. And with the expected growth and need for change to meet your changing needs and the needs of your audience, yours must be a flexible blogging platform. Starting on the wrong platform often means starting over when you need to make a switch later.
So, with your future plans in mind, the highly recommended blogging platform is (as you guessed), WordPress. While you have Tumblr, Blogger, WordPress.org, Medium, Ghost, Weebly, or Squarespace to choose from, blogging on the WordPress platform is one of the best decisions you can make for your blog.

Why WordPress?
-
It is a free platform
Free and anyone can use it. WordPress does what most other platforms fail to do – it offers free professional layouts, themes, and add-ons.
-
It’s highly customizable.
With the hundreds of themes and plugins made possible with WordPress, you can add on to your blog’s functionality effortlessly.
The presence of free subscribe here and contact boxes and plugins available; you will be able to boost your blog’s performance effortlessly.
-
It has an easy setup process.
The last thing you need is a complicated setup process. WordPress understands just that hence their simplified processes.
-
It’s safe and highly secure.
The other reason why you should consider WordPress is its enhanced level of security. It’s always updating their software keeping things safe and secure on your end.
You hardly have to worry about phishing or hacking attempts. As long as your devices are protected, and you access secure sites, your blog will be safe.
Note that the high safety standards set by WordPress are the reason why big sites like Time Magazine use the platform.
Caution, while free blogs are alluring, they a death trap for your blog.
What you need is a self-hosting solution for your WordPress Blog. Self-hosting gives you control over your content and the website.
Some of the damaging effects of self-hosted blogs include:
- Lack of control over your content since the blogging platform controls everything
- Your blog’s web address will be hard to remember, and also unnecessarily and annoyingly long. You need a catchy, even branded web address; something you cannot get from a free platform you have no control over.
- You cannot advertise. How else will you make money?
Feels like we are at crossroads and your rage is building up… and I know what you are thinking…But, you are bringing up these issues, yet you mentioned above that WordPress is a free blogging platform. You even defended it as the best!
Well, here is the other thing you should know about WordPress blogging platforms – this is a mistake most beginners overlook or aren’t aware of: There are two WordPress blogging platforms: WordPress.com and WordPress.org.
WordPress.com is the one with the limitations above. WordPress.org is the platform you should get started on given it’s a self-host platform – and without the limitations above. WordPress.org will also lessen the technical complexities that come with change and growth.
Now that we’ve settled things: it’s time to choose and register a domain name and also find a web host.
As determined above, the self-hosted blog platform option is the best.
Next up…
Step3: Choosing Your Domain Name
Your domain name is your brand identifier. It’s how people will learn about all those awesome articles you’ll write. You want your readers to remember and recognize your brand easily. So, be careful about the name you choose.
For the best blog name/ domain name, channel your passion/hobbies or life experiences. Also, it’s highly recommended that you choose a .COM, .NET, .ORG over other extensions because the this domains are easier to remember.
Aim for 2 or 3 words for the name since most single-word domains are already taken. When naming your blog, use keywords that are a representation of what your blog is all about – this helps in identifying your blog niche and search engines can easily distinguish your blog.
Avoid numbers and hyphens because they are difficult to remember. And, always go for catchy or memorable. To build your personal brand from the first day your blog goes live, use your name or its memorable variation.
The good news is that there are tools you can use to determine whether a name is available or not. A domain name goes for an average of $10 annually.
Step4: Buy Domain Name & Web Hosting
Web hosting is that service that makes your blog accessible on the internet. Think of the host as your blog’s home because your blog cannot be seen online without a host. Web hosting also ties to the domain name because you won’t have an address through which people can read your content without the name. You cannot have one without the other.
The cost of hosting varies greatly, from $3 to as high as $10 per month.
When starting, start small. Research and compare hosting rates. Take advantage of the discounts.
Note, however, that the cost of the web hosting service is not the only thing you should look at. Choose your host with uptime and page load speed in mind.
The page load speed refers to the average amount of time, in seconds, it takes for the blog to load.
Uptime refers to how often your site is expected to be up and running. Here we use Fastest Web Hosting to start a blog.
Now Let’s follow Below easy steps to setup your new domain & web hosting account. Here we will choose 3 best web hosting service that are all time popular to purchase Domain name & Web Hosting account.
The 3 best hosting providers are Bluehost, Siteground & A2 Hosting. You can choose any one hosting from Bluehost, Siteground & A2 Hosting to buy hosting and install wordpress.
We will explain 3 things below that are following:
- How to buy Hosting & Domain name with Bluehost & Install WordPress Blog In Bluehost.
- How to buy Hosting & Domain name with SiteGround & Install WordPress Blog In SiteGround.
- How to buy Hosting & Domain name with A2Hosting & Install WordPress Blog In A2Hosting.
Choose any one from below three list and continue to Step 5 That is Blog Design.
Let’s start with buying Hosting & Domain Name.
Buy Hosting & Domain Name With BlueHost
Follow Below Steps to Buy domain name and web hosting from BlueHost.
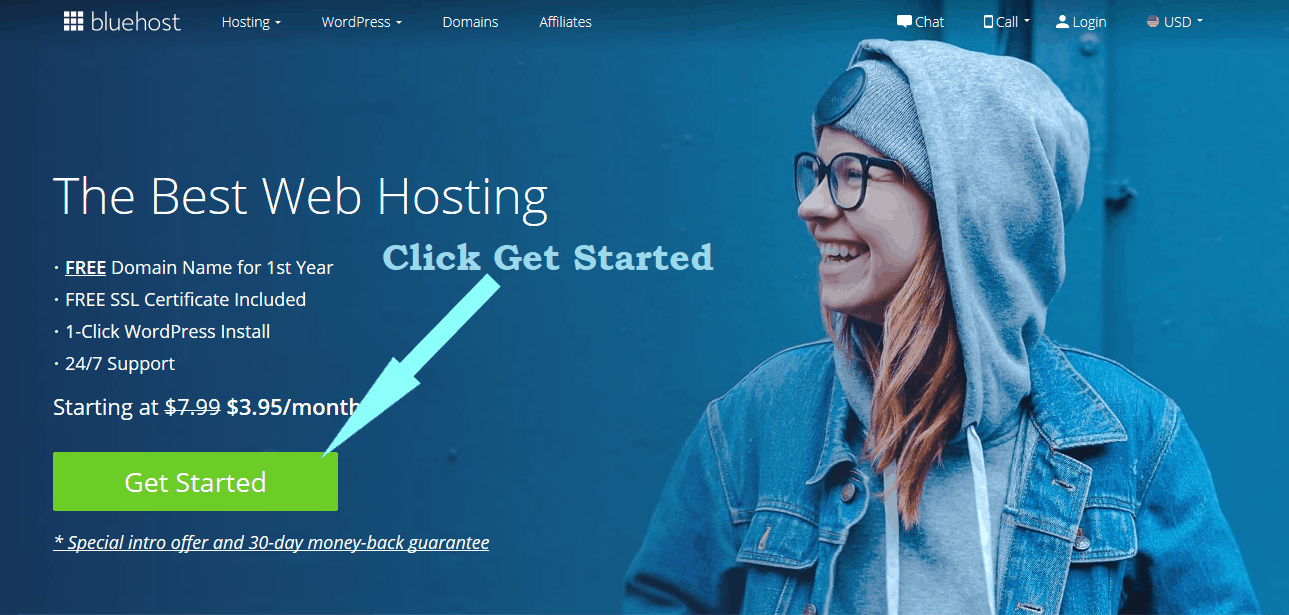
1. Visit BlueHost Discounted Pricing Page. Then click on Get Started.
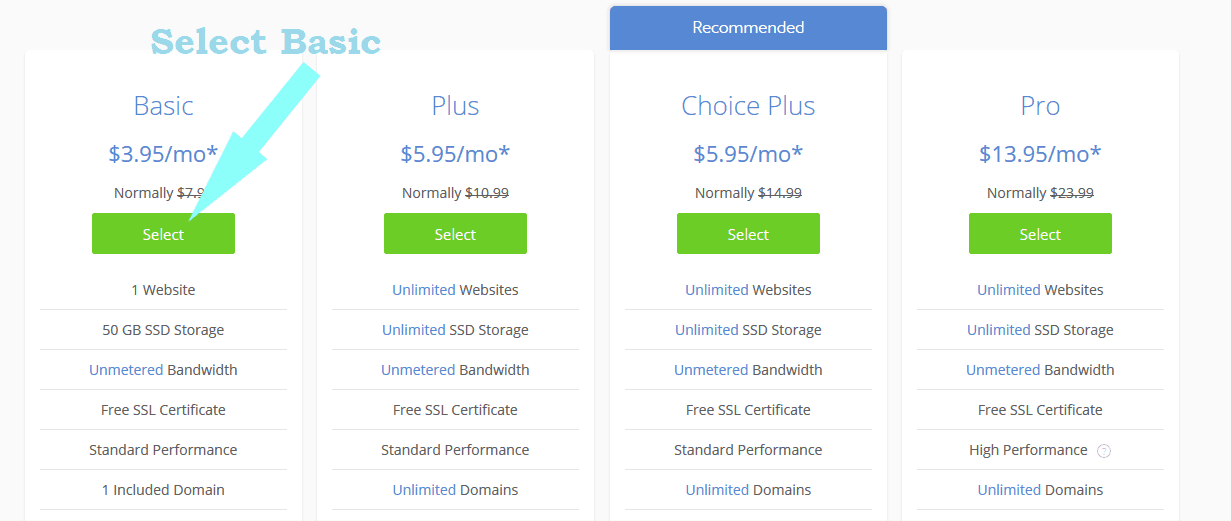
2. Select Basic plan or you can also select Plus plan.
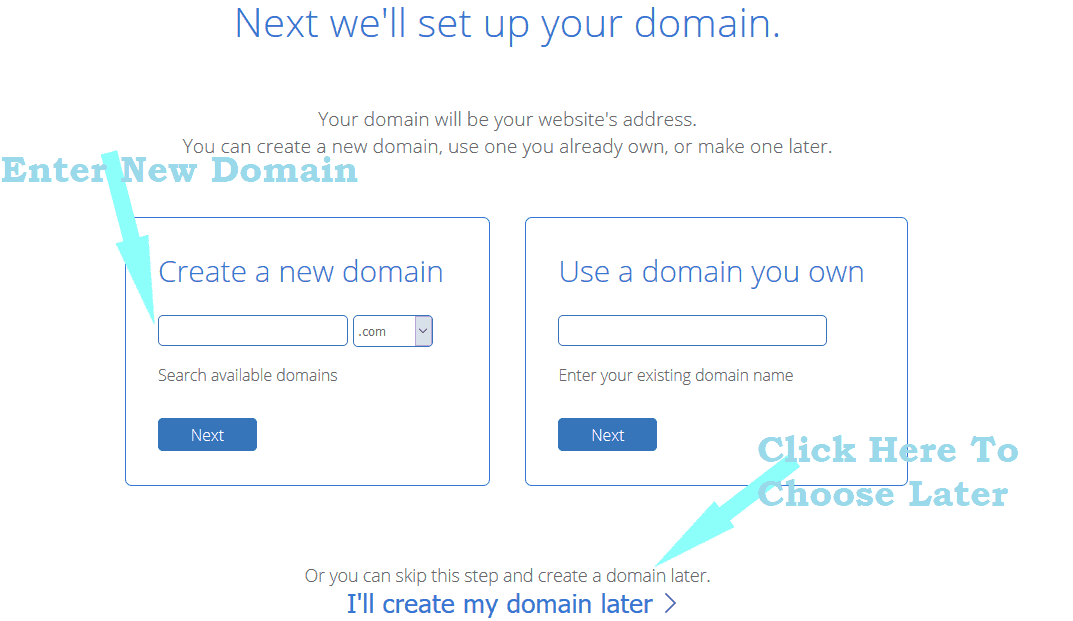
3. Now enter domain name that you want to register for free. Or click below “I’ll Create my domain later“.
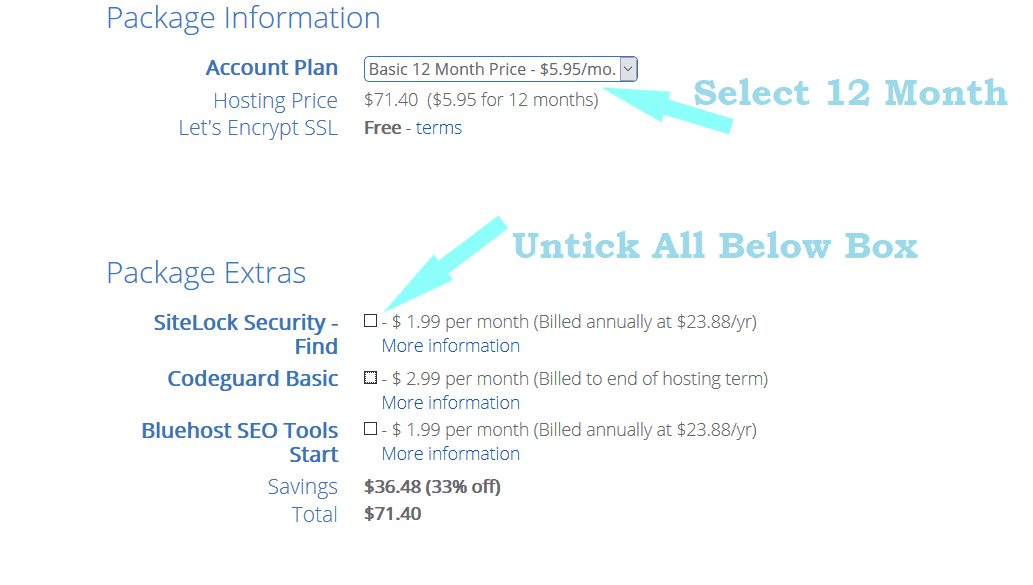
4. Select 12 Month & Untick all below box if you want save some money.
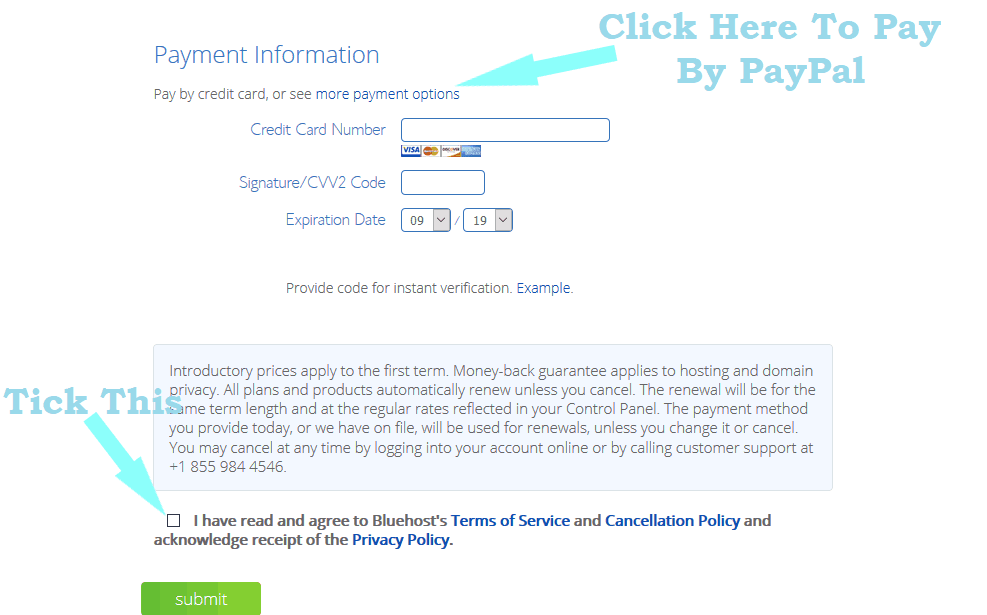
5. Now enter your payment details. You can pay with paypal just click on”more payment options“. Now click on submit.
Great. You have bought your domain name & hosting account. Now it’s time to install WordPress on your bluehost hosting account.
Installing WordPress On BlueHost
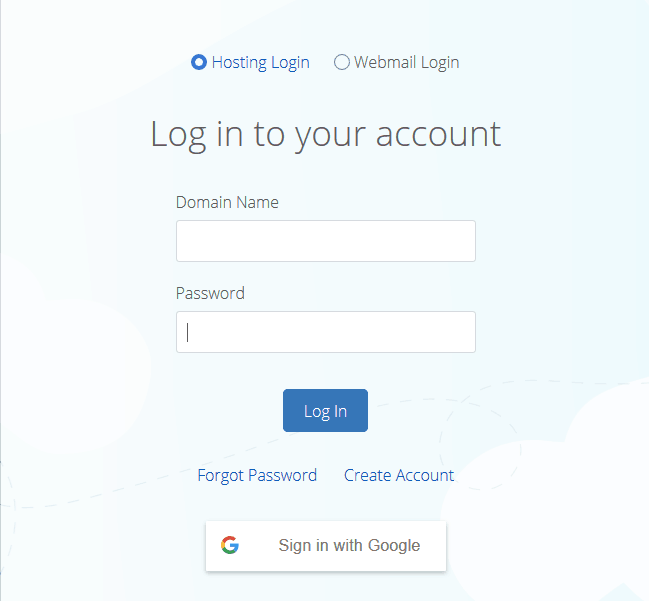
1. Goto BlueHost.Com and Click on Login. Enter your domain name and password to Login in Bluehost. You can also login with Google just click “Sing in with Google“.
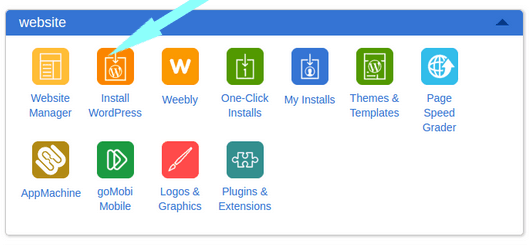
2. After login Find the Website section and select Install WordPress.
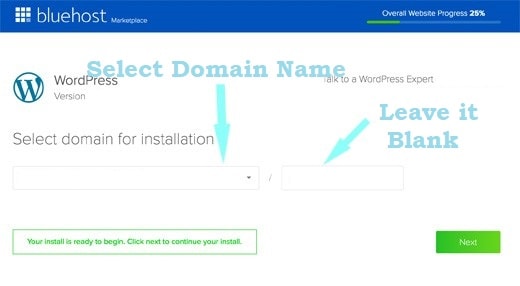
3. Select the domain name then click the Next button.
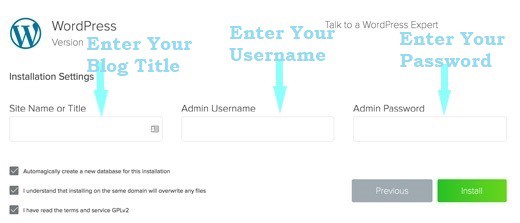
4. Enter your Blog title, Username & Password. Then click on Install. Keep this username & password on safe place you need this every time to login into your wordpress blog.
Congratulation you have successfully installed WordPress on Bluehost and Created Your New Blog
To Login in to your Blog Goto: http://your-domain.com/wp-admin/
Then enter your username & password then click on “Log in” button.

Buy Hosting & Domain Name With SiteGround
Follow below steps to get a domain name and web hosting from SiteGround.
1. Visit SiteGround Discounted Pricing Page.
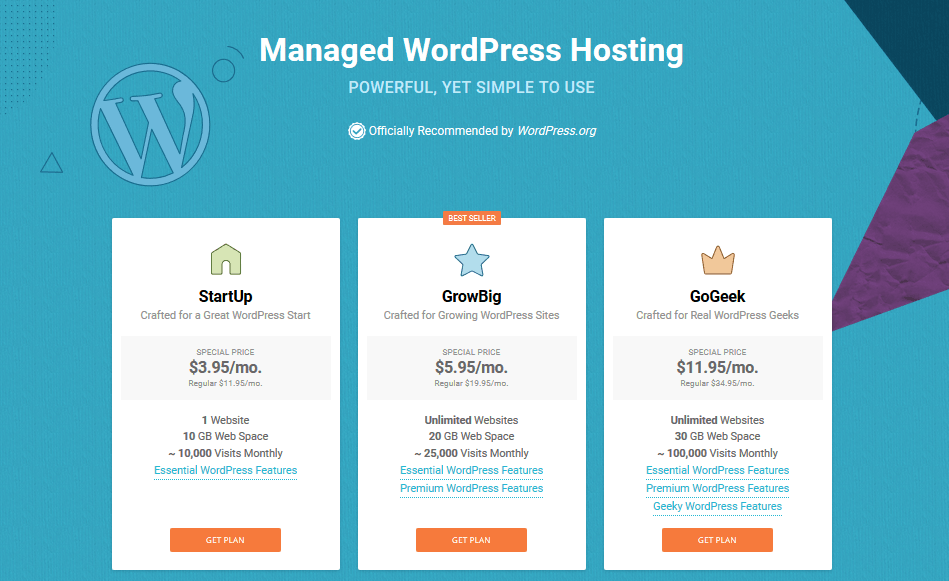
We recommend you to select StartUp plan because it has too many features at very low pricing. Click on “Get Plan” button. If your budget is high then you can go with GrowBig or GoGeek plan.
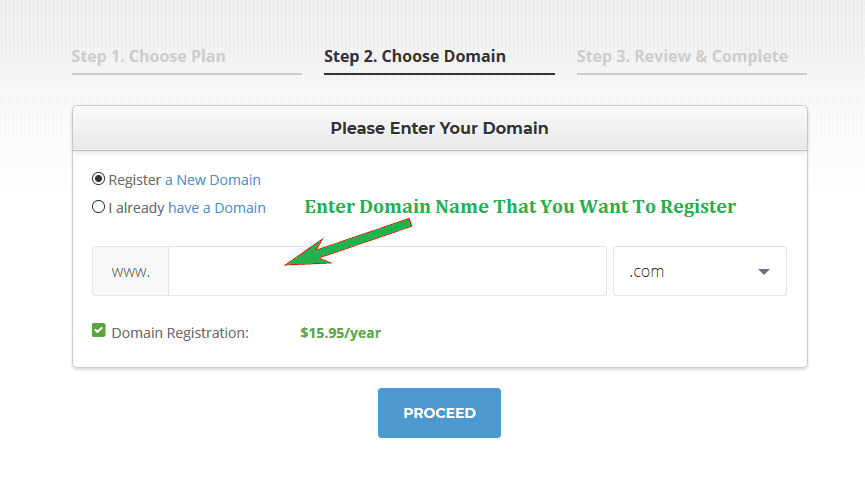
2. Enter the name of domain that you want to register for your blog. click on Proceed button After enter the domain name.
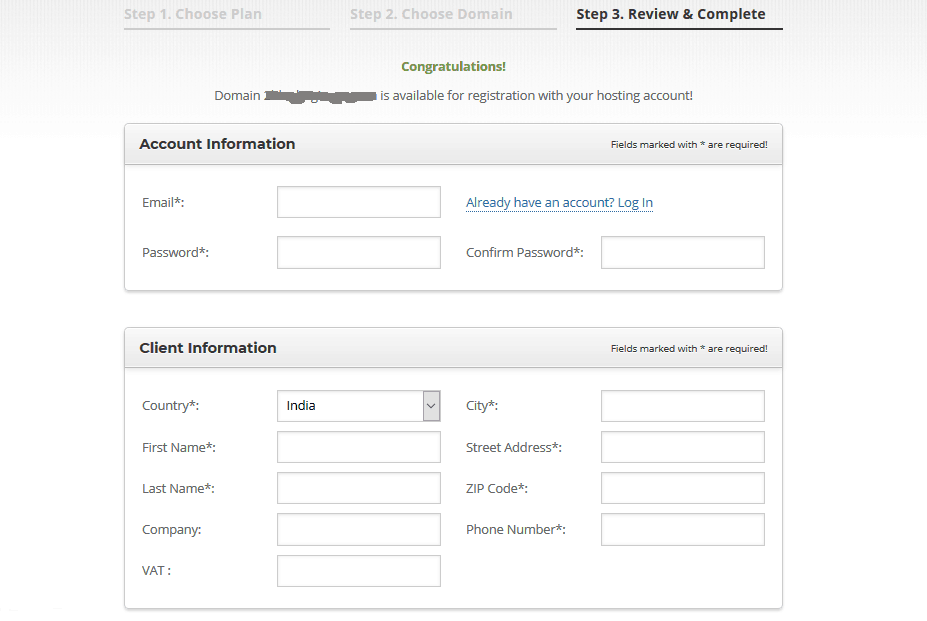
3. Enter your account details that asked.
4. Now Enter Your Credit or Debit Card Detail for payment.
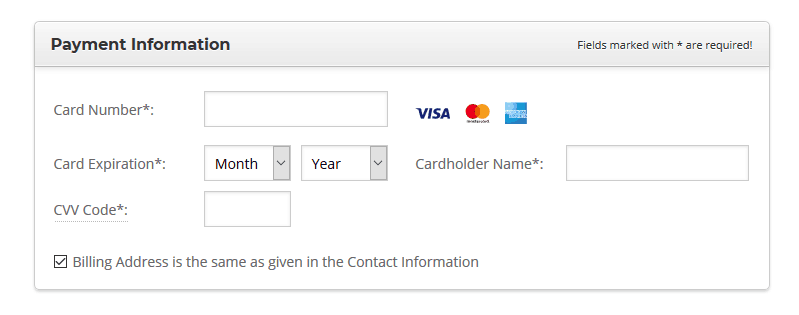
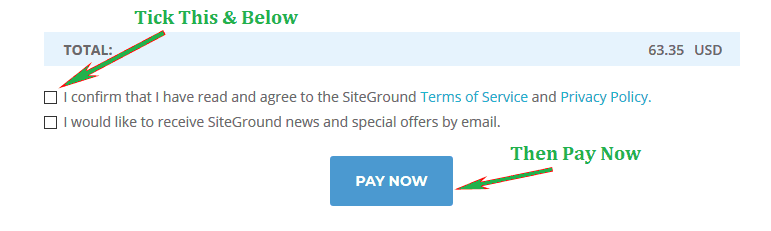
5. Tick on the box of SiteGround terms as seen below. Then Click on Pay Now to Complete the order.
Installing WordPress On SiteGround
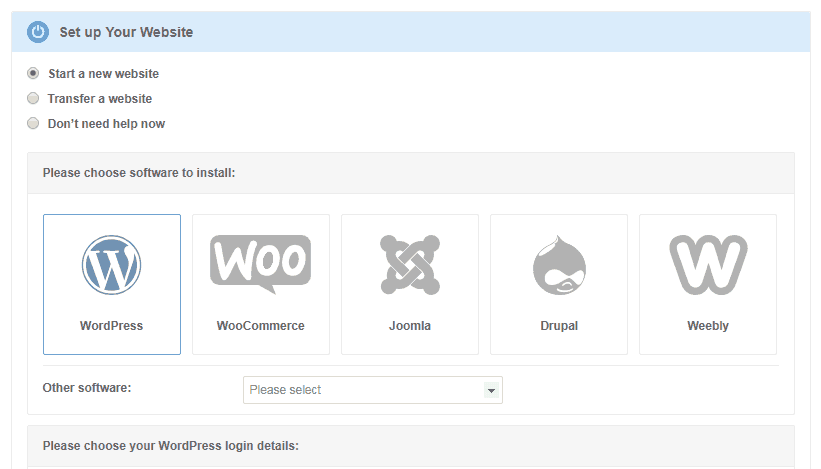
1. Login to your SiteGround account then you will see screen that look like below image. Make sure to select “Start a new website” then select WordPress.
2. Enter your email. Then enter username & password of your choice.
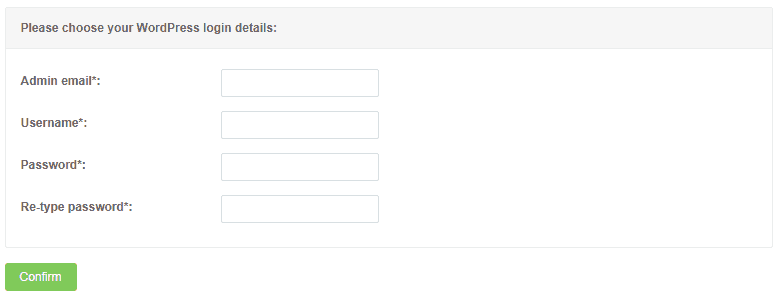
3. Now tick on SiteGround Terms as seen on Below image. Then click on “Complete Setup”.
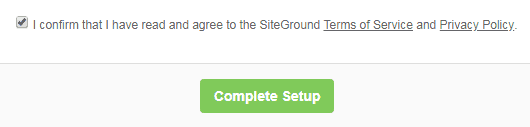
Congratulation you have successfully installed WordPress on SiteGround and Created Your New Blog.
4. Now Click on “Proceed to Customer Area”.
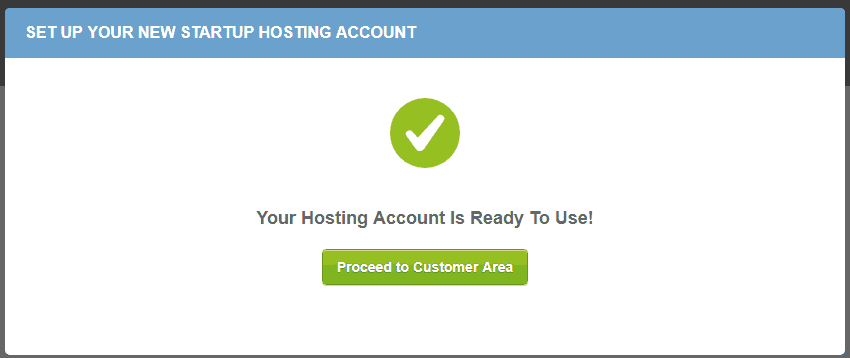
Go to My Account & click on “Go To Admin Panel button” to login to your WordPress Website. You can also visit
To Login in to your Blog Goto: http://your-domain.com/wp-admin/
Then enter your username & password then click on “Log in” button.
Buy Hosting & Domain Name With A2Hosting
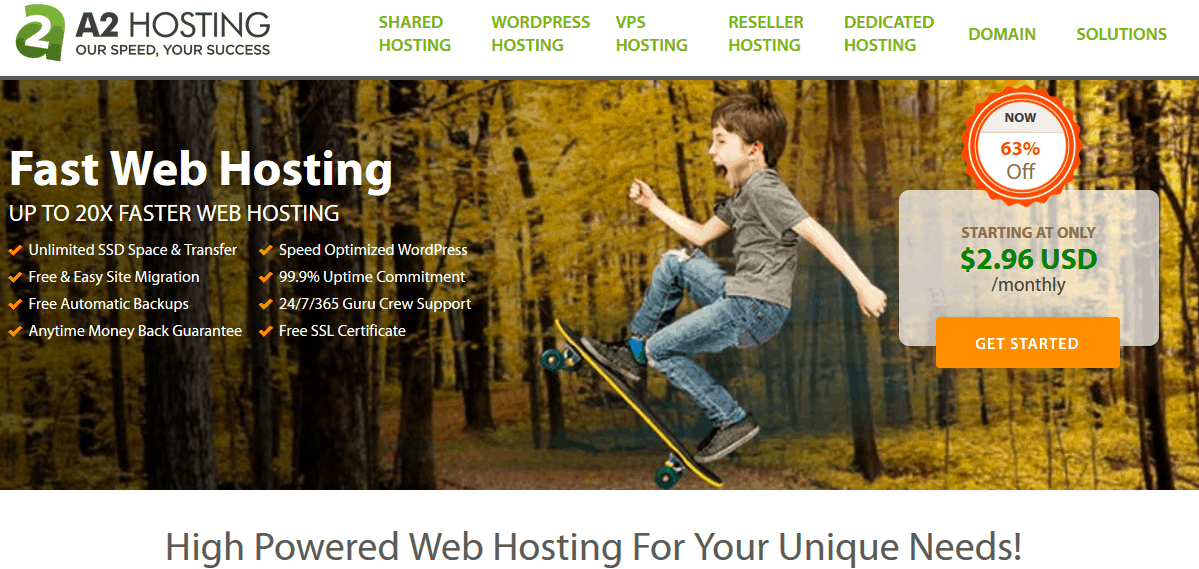
We recommend you to use A2Hosting because they are World’s No.1 with Fastest and Reliable hosting provider. We also use A2Hosting for many of our Blogs.
BlogBeginner.Com readers can get special discount from A2Hosting. Just follow below & click on button to Claim Your Discount Now.
1. Click Here to Visit A2Hosting Discounted Price Page & Get Hosting From A2Hosting at Very Low Price.
2. Click On Get Started As Seen On Below Image.
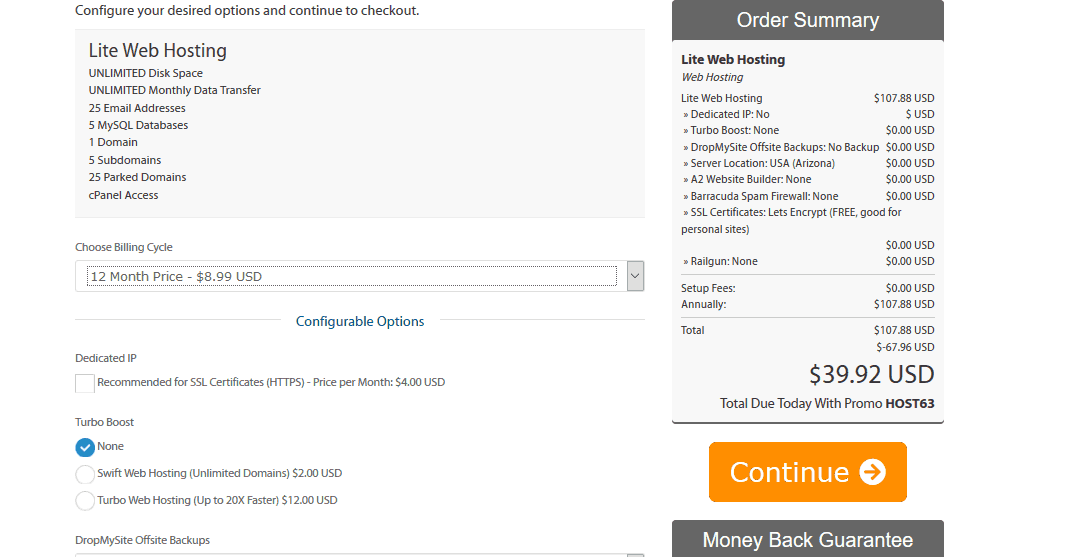
3. Click on Get LITE Because this plan comes with many benefits with very low price. You Can Also Choose SWIFT or TURBO Plan.
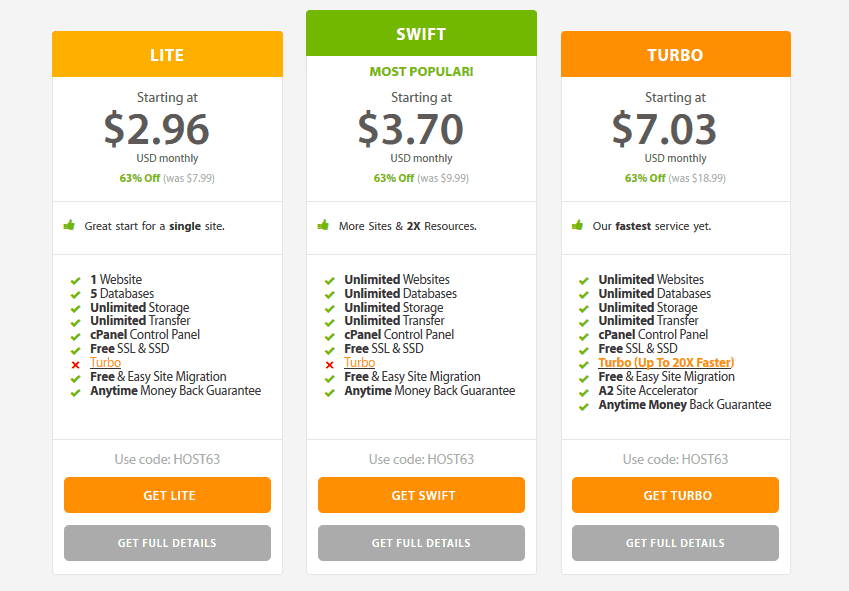
4. Now Enter your blog domain name that you want to register & click on check button. Now Click on Continue.

5. Now select 12 month because it’s cheap. However you can choose for 24 or 36 months to get higher discount. Then click on Continue.
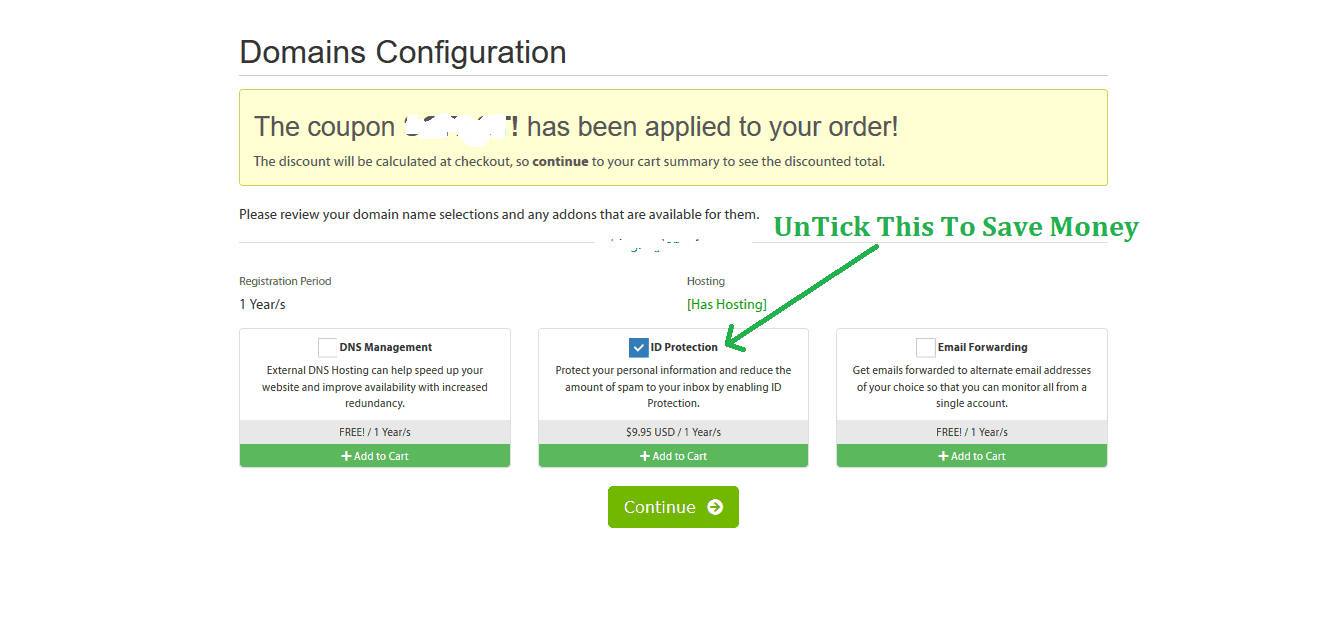
6. On Domain Configuration page you can Untick Id Protection to save money if you want. Now Click on Continue.
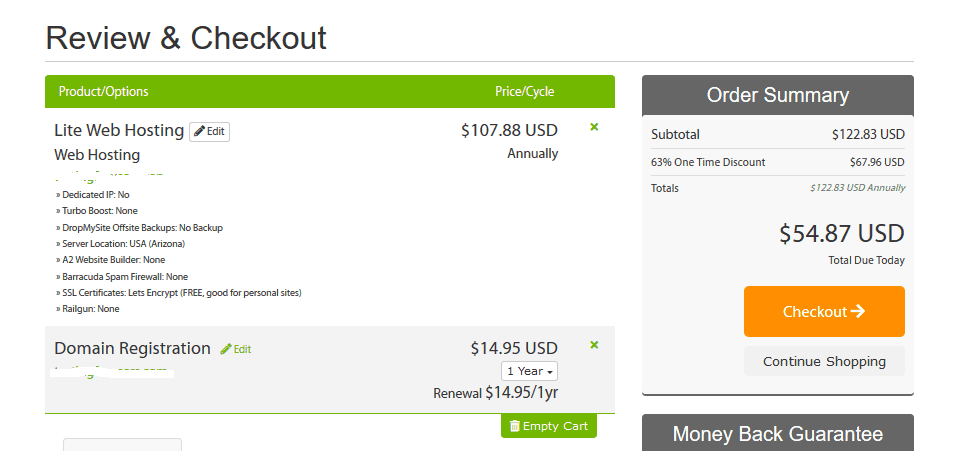
7. Now Click on Checkout.
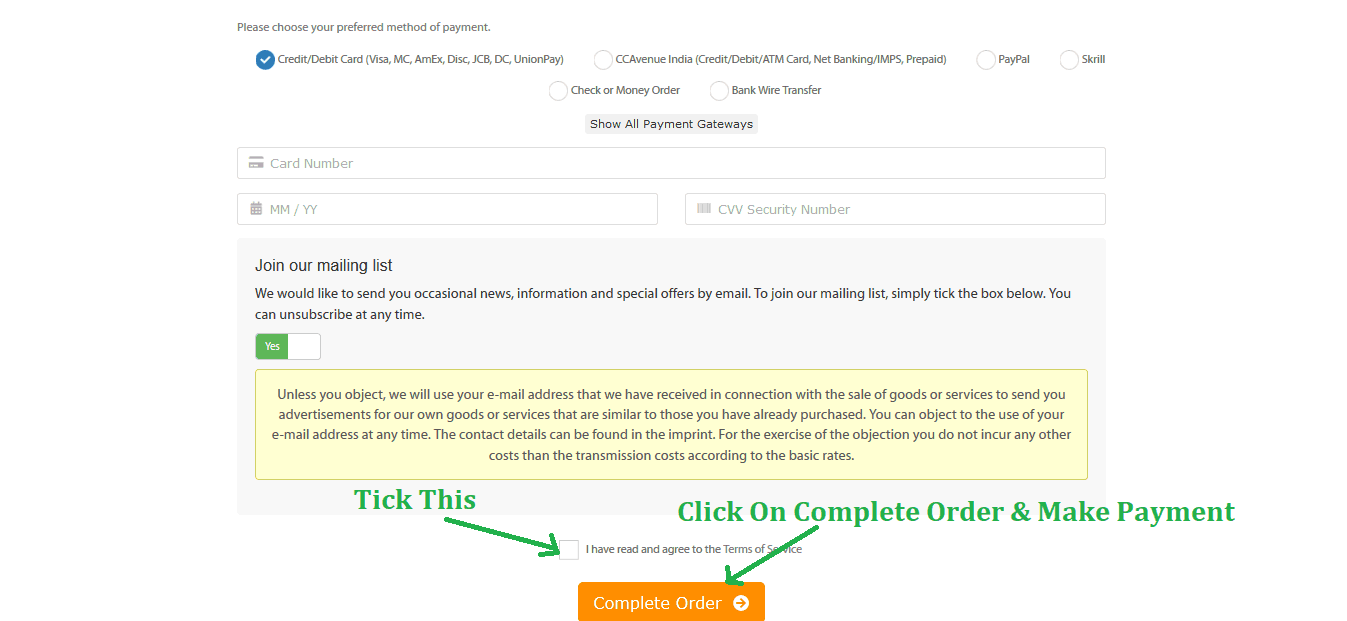
8. Fill the fields like Name, Address, etc. & Select your Payment Method Then Click on Complete Order Make the payment.
Congratulations you have completed the step of setup domain name & hosting account. Now move on next step.
Setting Up and Installing Your Blogging Software
On the web hosting site, click on the Start WordPress (Self-Hosted) Blog, enter the domain name, choose the hosting plan you prefer, and complete the registration process.
After registration, login to your new account then install the WordPress blog
Installing WordPress On A2Hosting
Once you have your domain & hosting account, follow below easy steps to install WordPress in it.
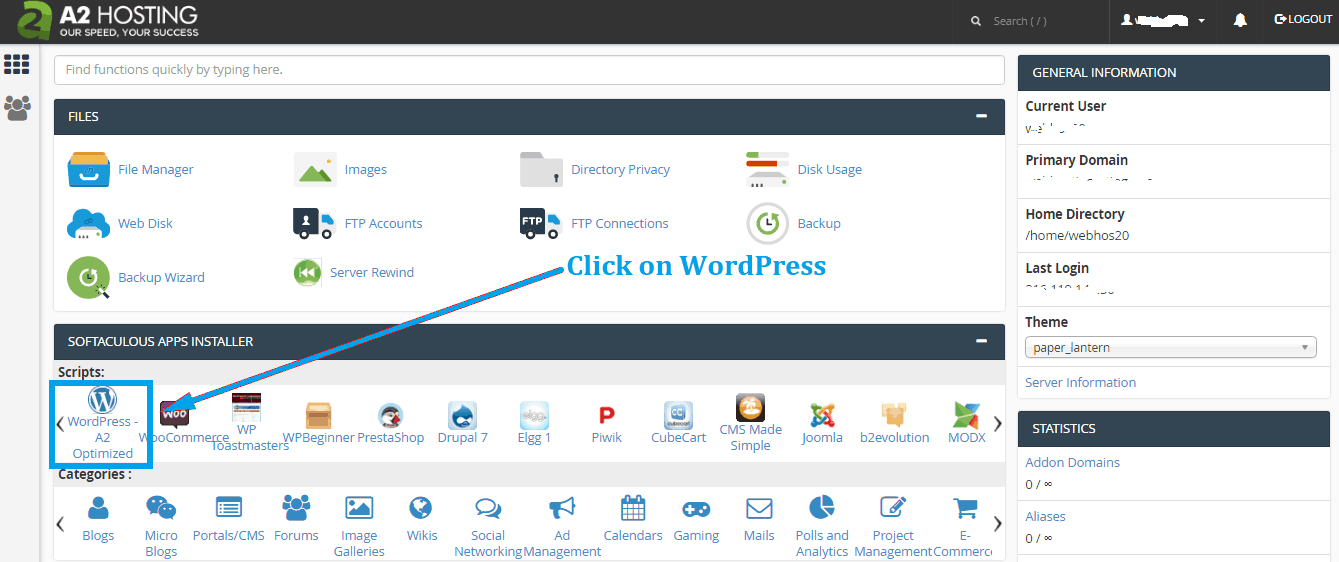
1. Log into your A2Hosting Account Control Panel (cPanel).
2. Click on “WordPress A2 Optimized” link, which can be found on the Softaculous App Installer section.
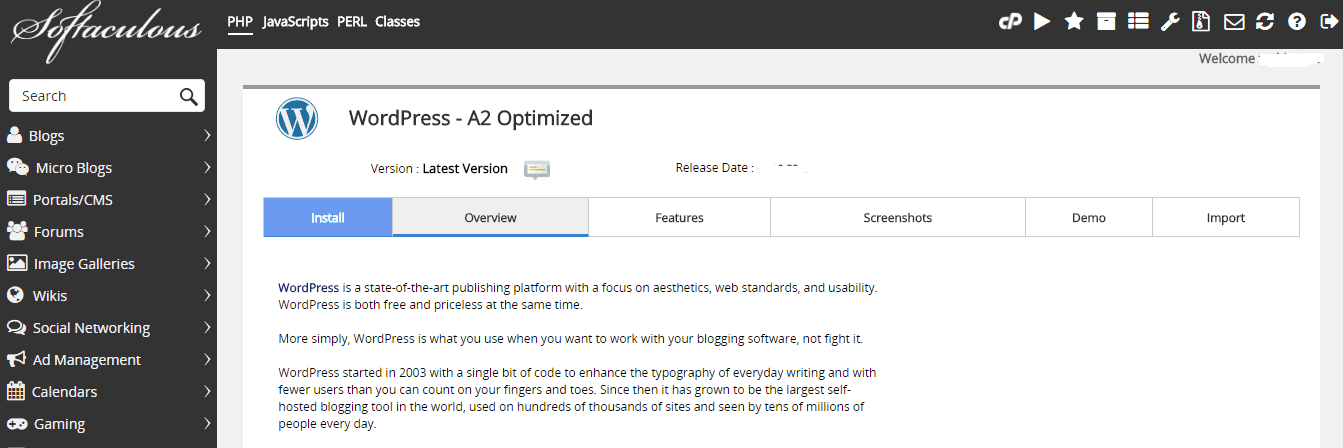
3. Click on Install As Seen on Below Image.
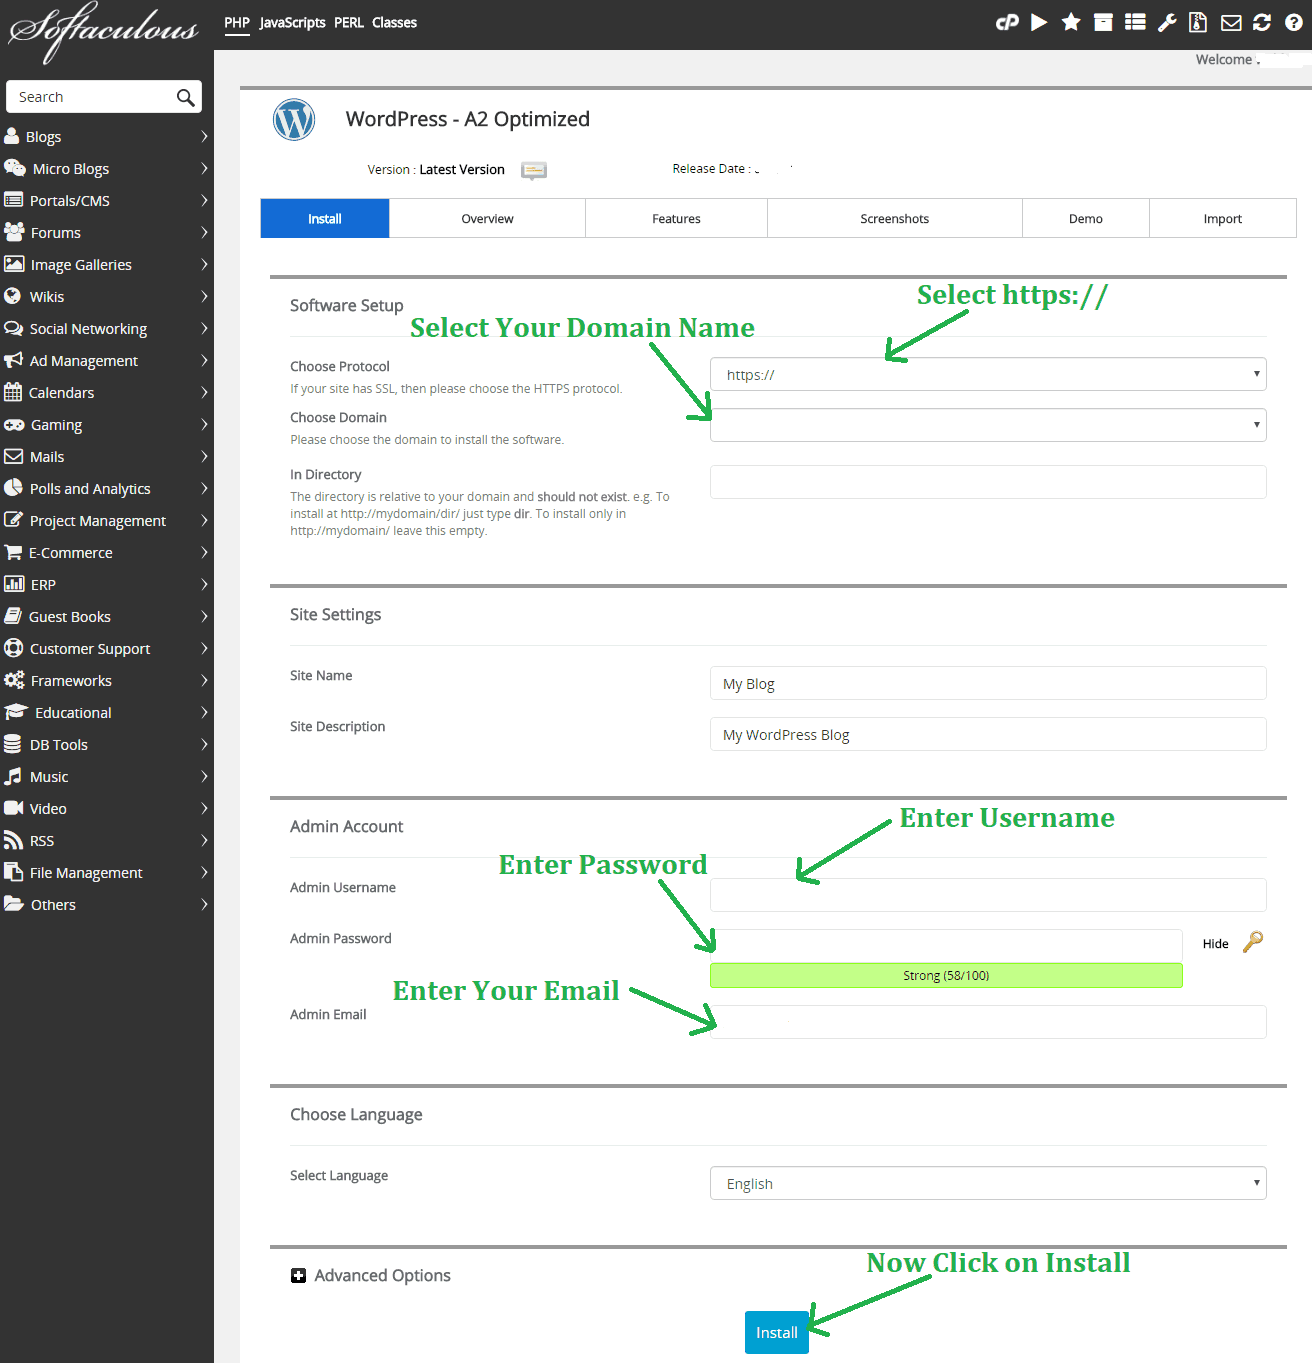
4. Now fill the fields as on below Image & At last Click on Install. Everything Done.
Congratulation you have successfully installed WordPress and Created Your New Blog.
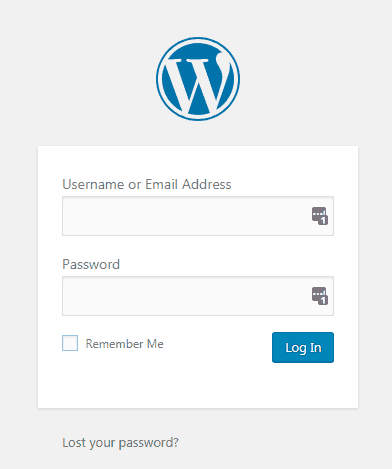
To Login in to your blog Goto: http://your-domain.com/wp-admin/
Then enter your username & password then click on “Log in”
Also Read:
- Top 10 Best Web Hosting
- Top 10 Best WordPress Hosting
- Top 10 Best VPS Hosting
- Top 10 Best Website Builders
Check out the list of top 10 best hosting service providers by clicking above links.
Step5: Blog Design
The steps above are among the easiest, and now comes the bit that requires a bit of work. We say this because your blog’s design will determine the impression you leave on visitors. The design of the blog is more of your brand’s face.
So, there are some important things you should know how to change your blog’s design, how to install a new theme or WordPress features and plugins, as well as optimizing your blog.
-
Dealing with themes and layouts
The WordPress platform employs design templates known as WordPress Themes. The themes will help you determine how your blog looks like. Fortunately, changing or installing new themes is not complicated. To change your theme or design, all you need to do is to install a new theme. With over 2000 free and fully-customizable themes (all professionally designed) to choose from, you won’t miss the perfect theme for your blog, however picky you are.
To find and install your theme, go to the admin panel or the dashboard, then, with the mouse hovering over the Appearance tab on the sidebar, click on themes. This action gives you several theme options to choose from. If the themes already installed into WordPress do not look like you, click the Add New button for a new theme option.
And, using the search bar and the Feature Filter functions, you can choose your preferred color schemes, layouts, or themes that come with advanced options. Apply the Filter chosen when satisfied. Then, click Install to install the theme. After installing it, active it.
Step6: Blog Optimization for Search Engine Traffic
Being hosted is not the only thing that ensures you are on the internet. There are several small and important things expected of a blog by search engines. Search Engine Optimization (SEO) is the next big and important thing you need to handle.
Search engine optimization refers to the process of optimizing websites so that they are found in search engines. For this to happen, the website should be optimized for specific phrases and keywords.
The success of your blog relies on how discoverable you are when a user enters specific keywords.
Being new to SEO makes blog optimization a daunting task, but WordPress is dedicated to making your life easy hence its simple optimization process. With WordPress making it easy for you to handle the technical bit of optimization, your main focus will be the optimization of content.
To optimize your posts, the texts, videos, and images, for a positive and interesting relationship with your readers, you can start by downloading Yoast SEO, a WordPress Plugin.
- Yoast SEO
On the plugins menu located on the side, click the Add New Button then search for Yoast SEO, click Install Now, then hit Activate when the installation is complete. The settings for the new SEO menu are accessible through clicking the icon at the top or the menu.
Using ‘Your Info’ tab, set the foundations for the blog. Here, you need to make sure that the website’s name and your tagline are correct. Before saving the changes made, identify yourself as either a company or a person.
Next up, the Webmaster Tools. In the Webmaster Tools tab, click the Google Search Console tab.
Google Search Console is an invaluable webmaster tool that lets you submit your site to the search index, and it also helps you optimize your visibility.
To optimize visibility and for Google to index your site, you should go to your Google Account (Gmail or Google Drive). Once logged in, click on the Alternative Methods tab then select the HTML tag.
Under the HTML tag, use the drop-down menu that appears along with your search console meta codes them copy the alphanumeric string –the one without quotation marks. Paste that code into Google Search Console text box, and then click the Save Change Tab.
The final step – click the Verify button.
- XML Sitemaps
This is the other important setting in Yoast SEO. The XML sitemap refers to a file which lists a website’s URLs. It’s invaluable as it helps Google and any other search engine to crawl your website for any new pages and posts.
Yoast comes with a built-in feature that will automatically update your sitemap. You don’t have to go back to it or worry about forgetting it – you can actually forget about it!
To activate the sitemaps, go to the Features tab and then set the Advanced Settings Pages to Enabled. Save your changes.
When you do that, you will get a new group of menus at the sidebar and under the SEO. Click the SML Sitemaps menu. Choose the User Sitemap tab and toggle the User/ Author Sitemap to Enabled. Save changes.
- Webmaster Central
Note that as you go through the Webmaster Central, you will learn a lot more about the data-driven insights needed by your blog such as the keyword phrases you rank for, the ability to give Google a subtle nudge when you publish new pots, and you can also spot errors on the blog.
The next step in the blog optimization process will take you to the General Tab. Once there, start the installation wizard which will take you through a series of 10 simple steps.
The steps are:
- Welcome Screen (optional)
- Select Environment which suits your site best – choose the production environment
- Website type – select blog
- Company or person
- Add social profiles
- Post Visibility – Posts/ Pages – Visible and Media-Hidden
- Multiple authors or solo blogger
- Get Google Authorization Code – to pull data from Google Search Console. Click Allow to confirm access (pop up)
- Verify the Website name and choose your title separator. The title separator is the symbol that separates blog post titles from your site’s name in your meta title information. Google uses the title separator when finding blogs through search queries. The title separator is a personal preference.
- When you click next, you will receive a congratulatory message that confirms that you have optimized your SEO settings successfully.
You also need to keep your blog squeaky clean and professional.
For instance, you might not know this, but search engines dislike clumsy and ugly URLs, as well as spammy comments.
To be on the right side of search engines, there are several things you should consider doing to optimize your blog. First, we tackle the top two issues above:
Creating the perfect URL
You don’t want a clumsy URL that is all over the place with dates, hyphens, and slashes.
What you need is a blog URL that looks something like http://myblog.com/blogging-tips/
This URL is clean, neat, and short, compared to http://myblog.com/2018/11/topic-a/author-Mike/blogging-tips
Note that WordPress sets all permalinks to yourdomain.com/postID, as above – messy and ugly.
For a clean URL,
- Click on the Settings tab then
- select the Permalinks.
- Change the post name URL under the permalink settings.
- Permalinks refer to the static hyperlinks which lead you to a specific blog post or a page.
Encourage valuable comments
Comments are a huge deal in blogs. However, they can destroy your online reputation when they are spammy. So, even though you wish to leave the automated spam comments on to get people on your blog to theirs, and for advertising purposes, you must moderate your blog’s comments.
Moderating your comments is as simple as clicking on Discussion under the Settings Option. Under discussions, tick Email Me Whenever (i) Anyone Posts a Comment and (ii) A Comment is held for moderation; and Before A Comment Appears (i) Comment Must be Manually Approved and (ii) Comment Author must have a previously approved comment.
These two options will keep your comments section neat with relevant information.
Step7: Content Creation – Adding Posts and Pages to Blog
Now that we are done with the technical part of SEO, how about we delve into the on-page SEO strategies that will push you to the top of search engine result pages fast?
What do you need to focus on to create content that people want to read, and to boost your online presence?
Focus on your blog post titles
Guided by the reason and purpose of your blog, you should be able to craft interesting titles that push readers to click and read your content.
To create the best titles, focus on:
- What intrigues or stirs passion in your readers?
- Challenges your readers go through
- Traits of your readers and what they love about the chosen niche, as well as what they hate
Tricks for writing catchy titles
- Focus on the readers’ emotions then choose words that elicit the desired emotions
- Keep your titles short and precise
- Clearly outline benefits
- Share exciting news
- Ask a question
- Use How Tos to appeal to your readers’ hunger for knowledge
- Include numbers
- Create valuable information that turns you into a resource
Creating Optimized Content
You’ve successfully captured your readers’ attention. How do you keep them reading your content? How do you keep them coming back for more, right from day one?
Keyword Research
All SEO campaigns start with keyword research. Keyword research is the compass that guides your writing, steering your words in the right direction. It’s the only way for you to know what people are searching for – it’s the only way for you to know the challenges and problems your audience is facing. With that knowledge, you will know what to write about (and how).
For success in this step, you need to ensure that you are optimizing for the right keyword. Remember that every post or page on your website should focus on one specific/ main keyword and topic.
But, this doesn’t mean targeting one keyword on multiple pages. Doing this often means that Google will not rank your page.
To choose the right keywords:
Ask “what is the page all about?” The answer to your question guides you on the target keyword. And for even more specific results, ask Google.
-
Low competition keywords
Since you are only getting started, your website has a low authority, and you will have a tough time ranking for the competitive keywords, and it is important for you to start with the low competition keywords. Using low-competition keywords is one of the quickest ways for you to grow the blog’s search traffic.
You can tell how difficult it will be to rank for a certain keyword by checking out the keyword’s Keyword Difficulty (KD) Score.
-
Steal from the competition
The other trick is researching the keywords used by your competitors, and stealing the keywords form them. Since your competitors are already ranking for the keywords, why not use them?
You might also want to set up alerts spying on the new keywords used by your competitors, in real time!
Other strategies involve checking out the true traffic potential of a keyword by looking at the keywords that the #1 ranking page is optimized for.
Lastly, find gaps in the content on your blog and fill them, or find the questions that need answers from forums like Quora.
On-Page SEO Hacks
Content optimization is as simple as using the keywords in the post title, the introduction, meta description, conclusion, and sparingly in the body. However, knowledge of the elements of on-page SEO is crucial. These elements include:
- Title Tags
The title tag is not your page’s main headline but what you see at the top of your browser. It’s the information with the page’s source code. It is the “headline” that the searcher sees in the organic search results — the length of the title tag is between 55-60 characters.
- Meta Description
The title tag is the search listing’s headline, and the meta description is your site’s extra ad copy. It’s what tells readers about what the web page is all about.
- Content Curation
By now, you have heard, and you know that content is king. But as you figure out how to start a blog, do you know how to create content that makes the technical effort worth the pain?
And since you know what to write, how should you write? No, we are not trying to direct your voice or bend your thoughts into a pipe, all we are doing is giving you advice on how to write content that makes you likable to your readers and Google, boosting you up the SERPs ranks.
Why it’s important to write longer content
Recent research by experts like Backlinko’s Brian Dean and Hubspot reveals that Google and other search engines highly regard and rank lengthy content, as long as it delivers valuable content. So, while you start with 1000-word posts, you need to remember that.
Besides the high rank, lengthy and high-quality content easily turns you into a resource. It also receives more shares, it is relevant, and easily converts.
While creating lengthy content, don’t forget to keep your content unique and engaging.
Writing your first post on the blog
Now that you know what the webmaster needs, how do you make sure that it looks good before you hit Publish?
WordPress an editor like other word processing tools and you may use it or transfer content there.
To add new entries, click the Posts tab on the left sidebar then click Add New (top or at the sidebar) – this brings you to the editor. You can start blogging. Use the Toolbar Toggle Icon to edit your content.
Under Add New Post, the first thing you should do is to Add a Title. The title will immediately appear as a permalink that’s based on the keywords used.
After the title, type away, and edit / add media.
Note that Yoast SEO plugin has 4 primary settings for posts – SEO Title, Slug, Focus Keyword, and Meta description. Once you complete these settings, you will get a preview of what your posts will look like when discovered in Google’s SERPs.
The best part is that this WordPress SEO plugin will give you real-time feedback as you optimize your content. Your goal should be to get as many green lights as possible – even if you don’t get perfect scores. Anything above 80 percent of green lights means you are moving in the right direction.
If the blog has thumbnails, you should have a featured image – the featured image is the thumbnail that appears at the top of a blog post. For this, click the Set Feature Image tab.
Preview your post before publishing.
Some of the things to look out for include:
- A conversational tone and natural flow
- It should be easy on the eyes with enough white space
- Use headings to separate the sections
- Use lists and bullet points
- Check for grammatical errors and typos
When satisfied, scroll back to the top of the page and hit Publish.
Step8: Promotion
If you activated the social plugins above with Yoast SEO, then you are on the right path. But, that’s only the beginning. You also have to share your blogs across social media consistently. This means that you need some social media marketing knowledge too.
Confident that your first blog post will and the whole blog will be a hit?
Well, there’s one last thing you should do – Create an editorial calendar for consistency. Regardless of the purpose of the blog, you can only attract traffic by being consistent. Blogging is a tough job, not something you do when you feel like it.
An editorial calendar will keep you focused. Schedules make readers happy – humans are creatures of habit. And humans will forget you quickly if you don’t become a consistent blogger.
All you need is an Excel spreadsheet with publishing dates, title, keyword, and notes. Once you have these details on excel, go to Google Calendar and input the details above. Include notifications, and if you have a team, share the calendar.
After you do all these, you will be on the right track to being a top blogger. Monetization comes later. Monetization ideas include running ads or selling physical products.
Conclusion
How to make a blog sure sounds like a lot of work, huh?
Well, though this guide is long, the blog creation process is easy and takes a few clicks. The challenge is running a successful blog. With the advice given above, you will, however, reap great rewards.
All you need is a dedicated spirit, patience, honesty, a dash of adventure, and be you! Also, the internet is changing, keep learning strategies on how to blog to edge out your competition.
